


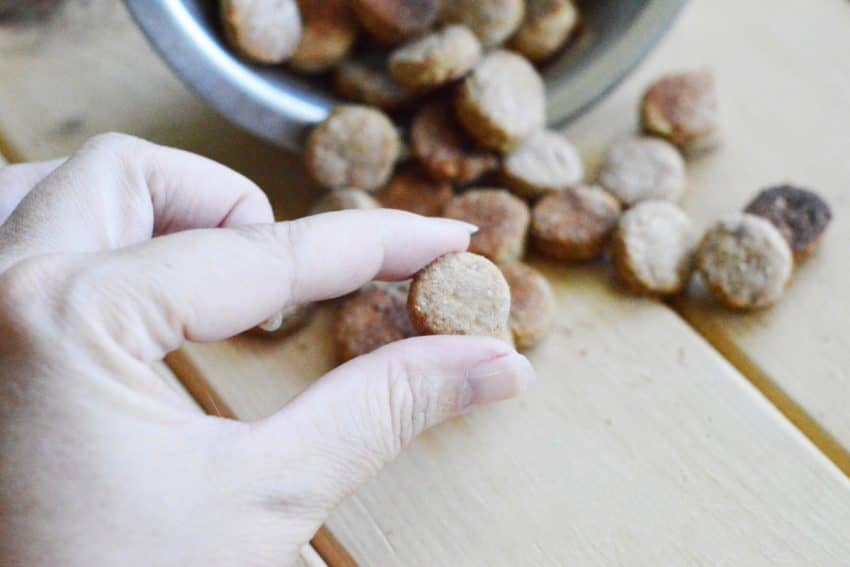
Looking for the perfect recipe for homemade mini dog training treats?
You will love this super simple idea!
It only has three ingredients and they can all be found right in your grocery store.
Read on to find out how to prepare it!
Do you prefer something hypoallergenic? Try them Limited Ingredient Treats!
Mini treats for training dogs Recipe

Training treats are essential for positive reinforcement dog training but it can be difficult to find the right ones in stores.
On the one hand, they still seem made for chihuahuas!
Even though we don’t need big treats for our big dogs, we definitely want to do more than just fill half of their teeth!
Another problem: if you look at the ingredients on any store-bought product dog training treatyou will see that it is loaded with preservatives and unnecessary fillers.
Additionally, if your dog suffers from certain food allergies, finding an option that works for them is almost impossible. Almost all treats contain chicken or beef, two of the biggest allergens for dogs.
By making them yourself, you control not only the ingredients but also the size.
Now let’s see the recipe. Keep reading after as I have some tips on choosing ingredients and making this a hypoallergenic treat.
This article contains Amazon affiliate links. If you make a purchase through these links, we earn a small commission at no extra cost to you.
How to Make These Mini Dog Training Treats
Check out the chart below for a quick list of what you’ll need to make these training treats for your puppy! You are not COMPULSORY to buy the brands I recommend, this is just to give you an idea:
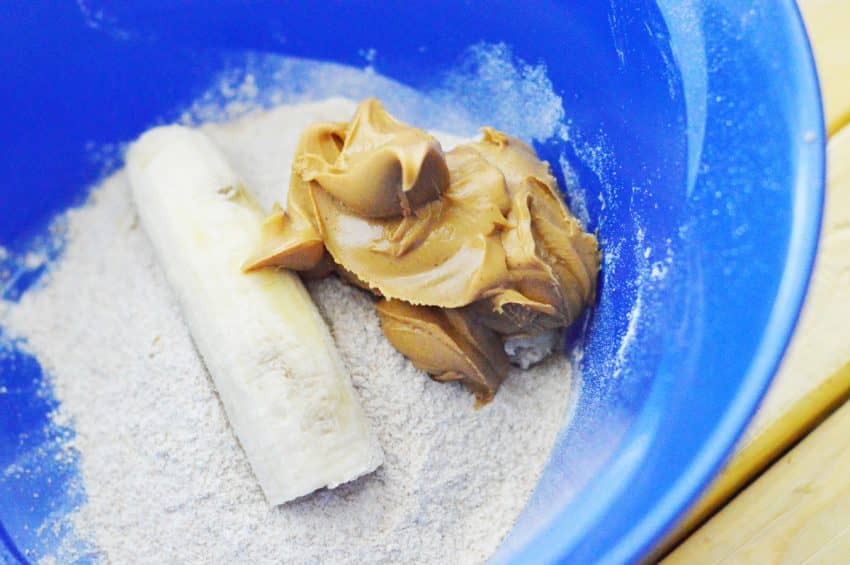
Ingredients
Supplies
- Baking sheet (aka cookie pan)
- Rolling pin
- Wax paper, parchment paper or a silicone baking mat to roll out the dough.
- Small cookie cutters, a pizza cutter or a knife to cut the dough into small pieces
- Mixing bowl
Directions:
- Mix the ingredients in a bowl and mash them together using a fork. You can also use a blender or food processor if that’s easier, but seriously, smashing it works great.
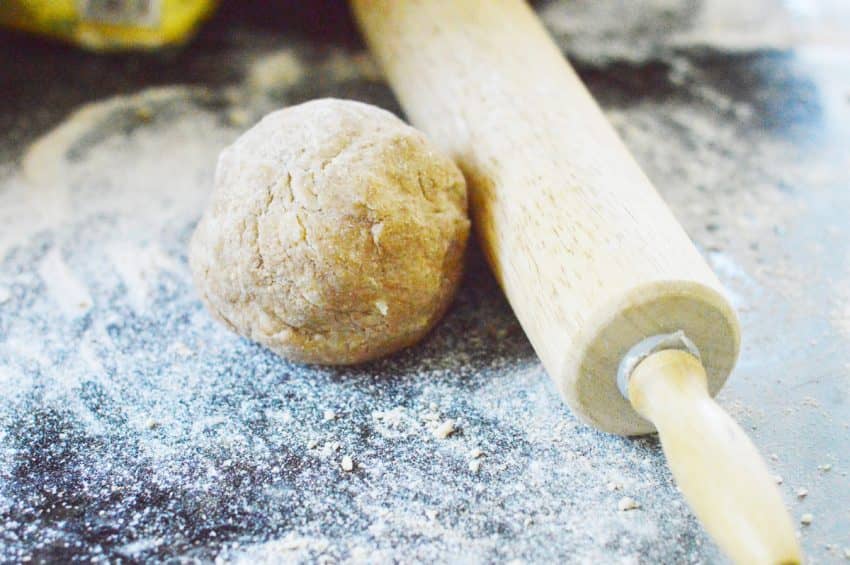
- Once mixed well, use your hands to knead the dough. Or you can use something like a Kitchen-Aid mixer if you really don’t want to put a lot of effort into it.
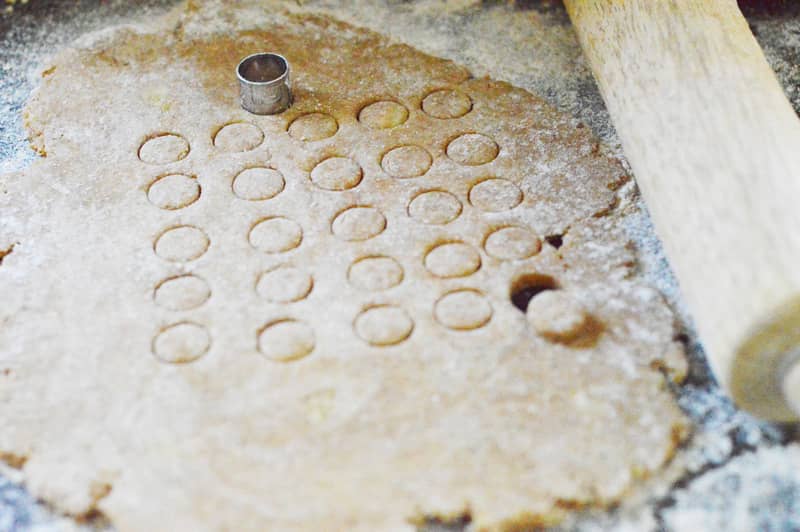
- Place the ball of dough on a flat, floured surface and roll it out to about ¼ inch thickness using a rolling pin.
- Using a ¾-inch cookie cutter, cut out as many pieces as possible, whatever shape you want. You can also just use a knife to cut them into pieces.
- Place on a cookie sheet lined with parchment paper.
- Heat the oven to 50 degrees Fahrenheit and bake for 12 to 15 minutes or until hard.
- Allow to cool before serving to dogs.
- Store in a tightly closed container. If you’re making an XL batch and don’t plan to use them all quickly, you can also store them in the freezer for later. Simply let them thaw before serving them to your dog.
*Tip: If you have a little more time, put the dough in the refrigerator for 30 to 60 minutes. This makes the job a little easier.
Optional supplements and hypoallergenic exchanges
Flour is really the only ingredient in this recipe that could be a problem for dogs with food allergies. Although they are major allergens for humans, very few dogs are allergic to bananas or peanut butter. So if you want to make this flour hypoallergenic, here are some alternatives to wheat flour:
- Amaranth flour
- Arrowroot flour
- Oats or oat flour
- Coconut flour
- Almond powder
- Millet
If your dog doesn’t like the taste of bananas (or YOU are deathly allergic and can’t even handle them), you can try pumpkin puree instead. You may need a little more flour, as pumpkin is not as thick as bananas.
Honestly, you can substitute bananas for just about anything. Even pureed vegetables like carrots and Sweet potatoes will work. Simply adjust the flour until you get the right consistency. As long as you can spread it out, it should cook just fine.
Oh, by the way, you can also use the exact same thing recipe for making dog biscuits! Simply cut them into larger pieces or use a larger cookie cutter.
Tips for Choosing the Best Ingredients
Although bananas are pretty standard and self-explanatory, below are some tips for choosing the right peanut butter as well as replacing wheat flour.
What is safe peanut butter for dogs?
By safe for dogs, we mean xylitol-free, because Xylitol is incredibly toxic to dogs.
Fortunately, very few brands contain xylitol and they are all specialty brands (like Nuts ‘N More).
Think high-end PB or health food stores, not mid-range grocery store.
If you stick to national brands like Jif & Skippy or generic store brands, you should be fine.
Just be sure to check the ingredient list. Some brands list it as “natural sweetener,” followed by “birch xylitol” in parentheses.
Ideally, you’ll also want to use a PB with no added sugar, like Spread the love. It only contains one ingredient: peanuts.
However, if you don’t really want to spend more than $10 on a jar of PB, honestly, Jif is fine.
I do my peanut butter treats for dogs with good old Jif, Skippy or even the Walmart PB brand and she hasn’t grown an extra head yet! 😀
As long as you give these treats to your dog in moderation, you shouldn’t have a problem.
Is whole wheat flour really okay?
Contrary to popular belief (and until a few days ago, my own belief), cereals are not bad for dogs.
A recent study even found that a grain-free diet can contribute to heart problems.
Now I’m not quite ready to let go of my dog grain-free food in the trash, but I think it’s good to include quality cereals in your treats.
However, if your dog is allergic to wheat, you will obviously want to avoid it!
In this case you can use something like coconut flour or opt for one of these dog treat recipes instead:
I hope your dog loves these homemade dog treats as much as mine does! They do good rewards during training time, and they are much healthier than just giving him pieces of cheese!
What do you think of these mini dog training treats? Share your thoughts below!

Last updated 09/15/2023 / Affiliate links / Images from Amazon Product Advertising API